
TLDR: If you’re looking for a more comprehensive and in-depth guide, click here!
If you’re running an online store or planning to start one using WordPress, chances are you’re familiar with WooCommerce.
It’s certainly a great e-commerce platform, but sometimes customising the look of your product pages can be a bit limited if you’re only using their default templates.
Fortunately, Elementor makes it easy for you to visually customise your WooCommerce product pages to match your own design and branding.
Source: How to Customize WooCommerce Product & Product Archive Pages Via Elementor on YouTube
Why Customise Your WooCommerce Product Page?
Customising your product pages not only enhances the overall aesthetics of your online store but also improves user experience and helps with branding.
Elementor allows you to take control of the design without diving into complex coding.
Getting Started with Elementor and WooCommerce
Before diving into customisation, ensure you have the latest versions of WooCommerce and Elementor installed on your WordPress site.
Also, have a few sample products added to your store so that you can follow along with this guide.
Step 1: Creating a Single Product Template
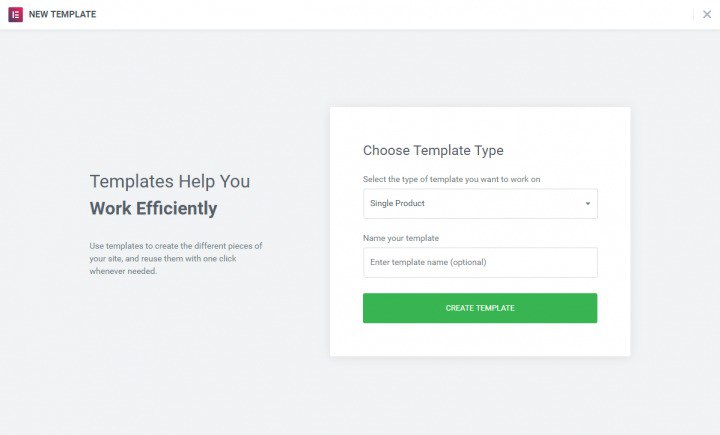
To start off, navigate to Elementor’s ‘My Templates’ and create a new template. Choose ‘Single Product’, then give your template the appropriate name and click on ‘Create Template.’
Step 2: Choosing a Design Style
To design your Product Page, you can pick a pre-designed Product Page Template or build one from scratch.
For pre-designed templates, you may use your saved templates or import one that you’ve never used before but intend to use.
If you do not have any existing saved templates or if any templates that you find you deem unsuitable for the design that you want, it may be more suitable for you to start from scratch without a template.
Step 3: Adding Product Widgets To Your Page
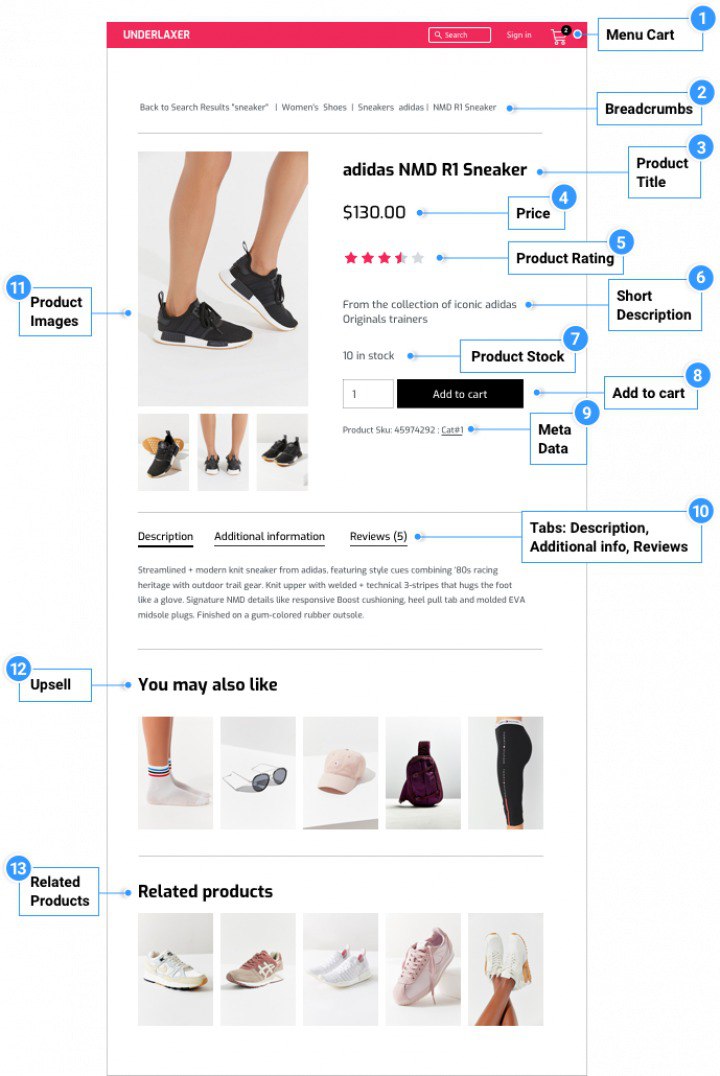
Elementor provides many different widgets to assist you in the design of your product page, including Product Title, Add to Cart, Related Products, and more as seen above.
To add widgets to your product page, simply find the widget of your choice, then drag and drop your selected widget onto whichever location your product page you find is the best for it.
Should you change your mind and find a better location for each widget, you can just drag and drop it elsewhere after its initial placement.
If you would like to see more widgets, you can find the full list and previews of each of the other widgets here.
Especially for e-commerce platforms, some widgets such as Share buttons, Upsell widgets, and widgets that showcase or link the visitors to your other products would be great in inter-linking your e-commerce site to even further boost sales and user engagement.
Each of the widgets will have its own formatting settings such as paddings and margins so feel free to change them to fit your design.
For widgets with text, you’ll be able to change their font style, colour, and so on.
Elementor also allows you to play around with the layout of your page where you can add sections and split these sections into columns of custom sizes.
Make use of all the different customisation options to make your site more visually appealing.
Step 4: Previewing And Adjusting Your Page
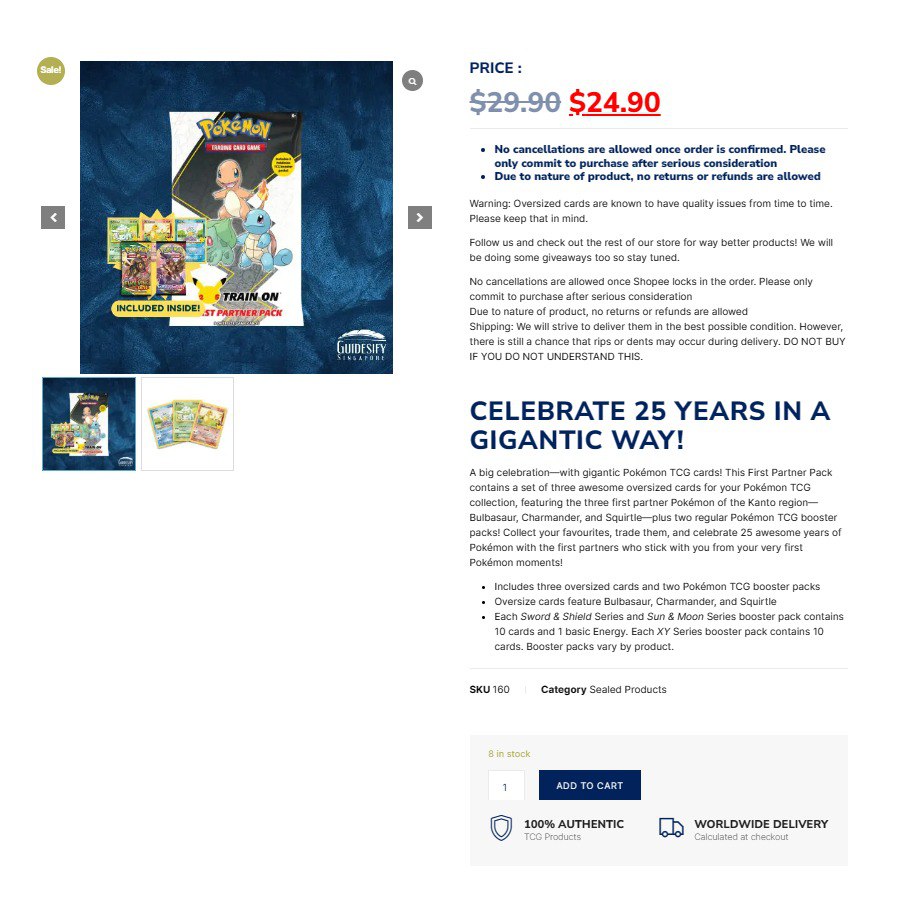
Source: A Product Listing on Guidesify Store
Preview your customised product page with different products to ensure your design looks great universally. You can tweak elements further until you’re satisfied.
Step 5: Setting Display Conditions
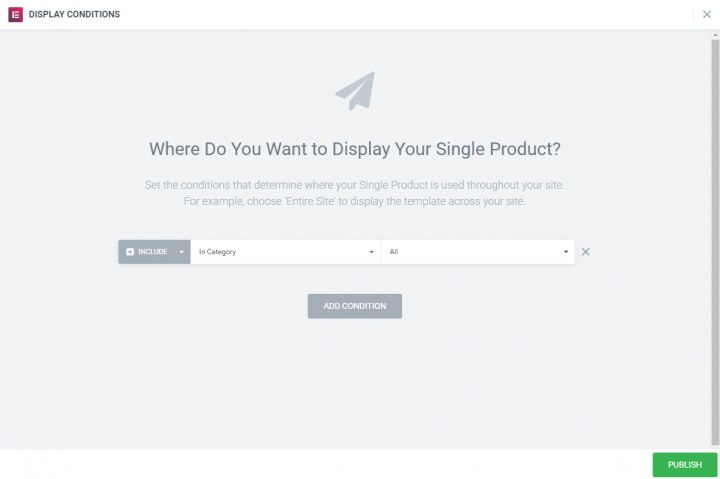
Once you are satisfied with your design, you should decide where your custom product template should appear.
The default option will apply this template to all product pages that you have but by setting conditions, you can make each template applicable to certain groups of products, such as only products of a specific category of your choice.
Managing Your Product Archives
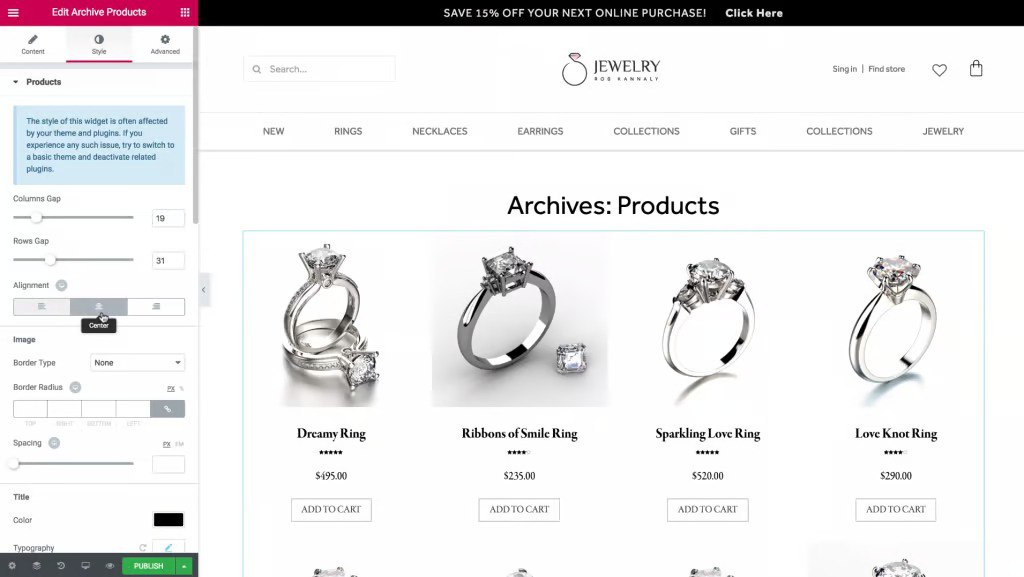
To maintain a consistent design across your store as a whole, it would be good to create a product archive template using Elementor.
Similar to how you have customised your single product template, you can customise the product archive template.
To do this, return to “My Templates” and then create a product archive template.
From there, the steps are similar to creating a single product template, where you can pick a pre-designed template or create one of your own from scratch.
If you want to keep the design consistent with your single product templates, go back to the single product template to copy the style, then return to the current product archive template to right-click and click “Paste Style”.
Once you have finished customising this template, turn your attention to “Query” under the “Content” section on the toolbar on the left while in editing mode. This will make the preview only show the specific products of your choice.
For those with many items in their store, it might be useful to use “Pagination” to limit the number of products shown on each page so as to not clump every product into one single page.
Once you’re ready with your design, click on “Publish”, then you can decide which products this product archive template will apply to based on their category and other conditions.
With Elementor, you can craft visually stunning and user-friendly product pages on your WooCommerce platform without the need for coding expertise.
Try to make use of as many features as possible to elevate your online store’s appearance and functionality, where the end result would be to enhance customer engagement and drive sales.
Ready To Take It Up A Notch?
If you’d like to learn more about customising your Single Product template, the following video might be great for you:
Source: Video on Single Product Template Customisation by Hamza – GoTechUG
The above video provides deeper coverage of each one of the available customisation options in the widgets that are used. This will be good for you if you really want full control of the design of your page.
For customising your Product Archive Template, the next video might be a good watch for you:
Source: Video on Product Archive Template Customisation by Hamza – GoTechUG
This video acts as a follow-up to his previous video about customising single product templates where you’ll learn more about how to make the design of your site consistent between product pages to eventually form a familiar theme to your site.
If you’d like to learn more about WooCommerce and Elementor, feel free to stick around for more guides like this.
Related To: