
In a website, what are things that every page has in common? Headers and footers.
These tend to follow the visitor, with the header usually offering important features of the site such as returning to the home page and navigating to other pages seamlessly, and the footer providing relevant information such as ways to contact you.
With Elementor Pro, creating and customising headers and footers will be a simple task for anyone familiar with WordPress. Let’s get started.
Creating a Header Template
Source: How to Create a Header Template With Elementor Theme Builder [PRO] – YouTube
Headers are vital for guiding visitors through your website. With Elementor’s theme builder, you can design a captivating header that remains consistent across your entire site. Here’s how to get started:
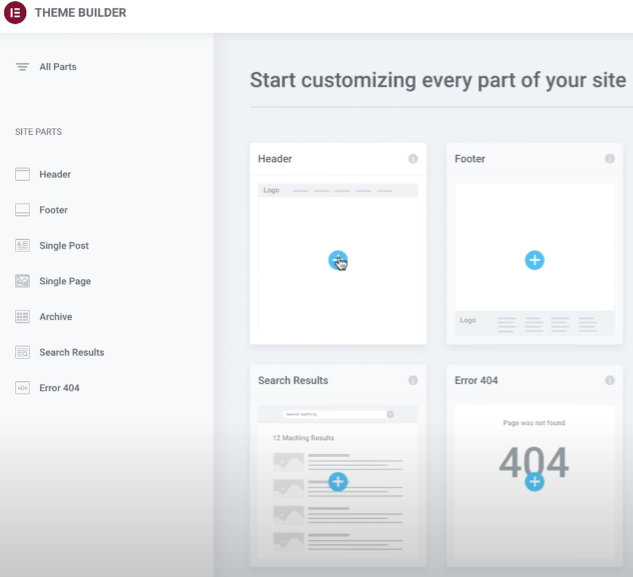
Step 1: Access The Theme Builder

From your WordPress dashboard, navigate to Templates > Theme Builder.
Step 2: Create a New Header

Click the ‘+’ icon over the Header option. In Elementor, you can either pick a pre-designed template from Elementor’s library of header blocks or create one from scratch using widgets.
To use a pre-designed template, simply select whichever template from the library or upload your own.
If instead, you would like to create one from scratch, just close the library window by clicking the “X” button on the top right of the library window.
Step 3: Customise The Header’s Elements
Typically, a header includes your site’s logo, the navigation menu, and a search icon or search bar.
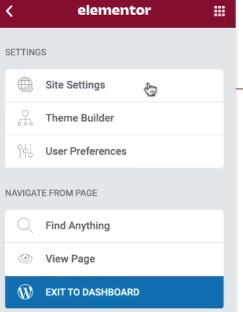
Since the site’s logo is globally used throughout the site, click on the 3 lines on the top left of your editor screen next to “Header Settings”, and click on “Site Settings”.
When the menu colour turns to blue from red, it shows that you are now editing globally throughout the site.
In this new menu, click on “Site Identity”, then click on the ‘+’ icon to upload your Site Logo and Site Favicon if you have not done so.
Depending on the template that you’ve selected, upload the image to make it show the site logo you have selected.
If you created one from scratch, you can add an image widget to whichever part of the header you want your logo to be shown.
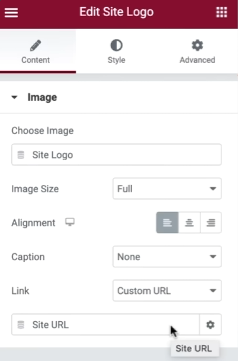
If you would like, you can link the site logo to your Site URL to make it return to your home page upon clicking it.
Go to Style in the edit pane and change the dimensions of the site logo, taking into consideration how they look on different devices to ensure mobile responsiveness.
If your current template does not have a navigation menu or if you want to add a new one, you may refer to this video here on creating and designing a navigation menu.
If you have any more elements on your header such as the search icon and want to edit them, just click on them and edit their attributes by using the edit pane on the left of your screen.
Once done, preview how the header looks like and then click on “Publish” on the bottom left.
Step 4: Set Conditions
You will then be prompted to specify the conditions for having the header displayed.
By default, headers would appear on every page of the site, so you can set them to “Include” and “Entire Site”.
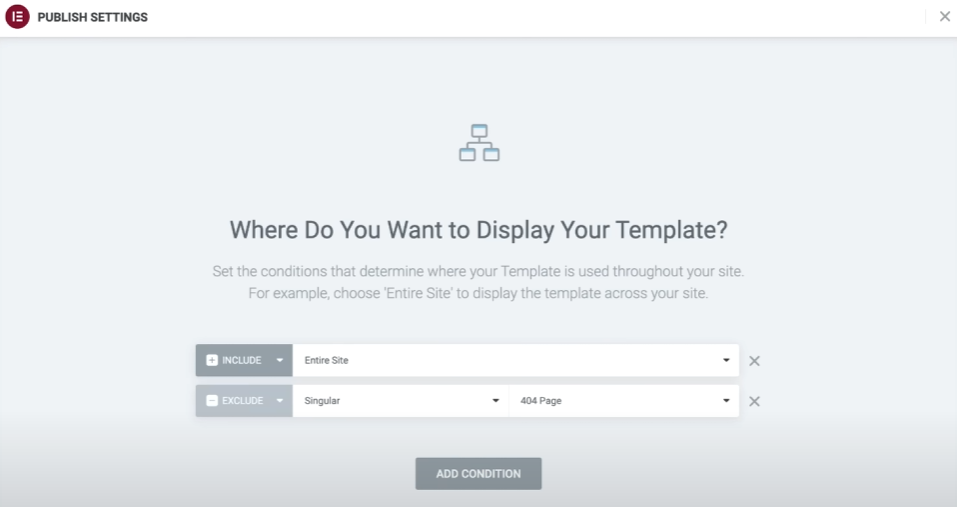
However, should you think it is best to exclude it from some pages, such as when a 404 error page is displayed, click on “Add Condition”, then change the “Include” into “Exclude” and exclude whichever page where you do not want the header to be shown.
Once you have set up all of the necessary conditions, click on “Save and Close” and your header will be ready to be displayed throughout your WordPress site.
Enhancing Your Footer with Elementor
Footers provide essential information and enhance user experience and like headers, tend to stick with the visitor throughout the site.
The process of designing them will be similar to that of designing headers, where the difference mostly lies within the content to be displayed.
Step 1: Creating A Footer
Follow the above steps that you have taken when creating the header, where you will once again, navigate to the theme builder. This time, however, click the ‘+’ icon over the “Footer” option instead.
Step 2: Choose A Template Or Design Your Own
Similar to headers, there are also 2 options for you when it comes to designing your Footer, which is to either select a pre-designed template via the library or to design one from scratch by clicking on the “X” button when the templates library pops up.
Step 3: Customise Content
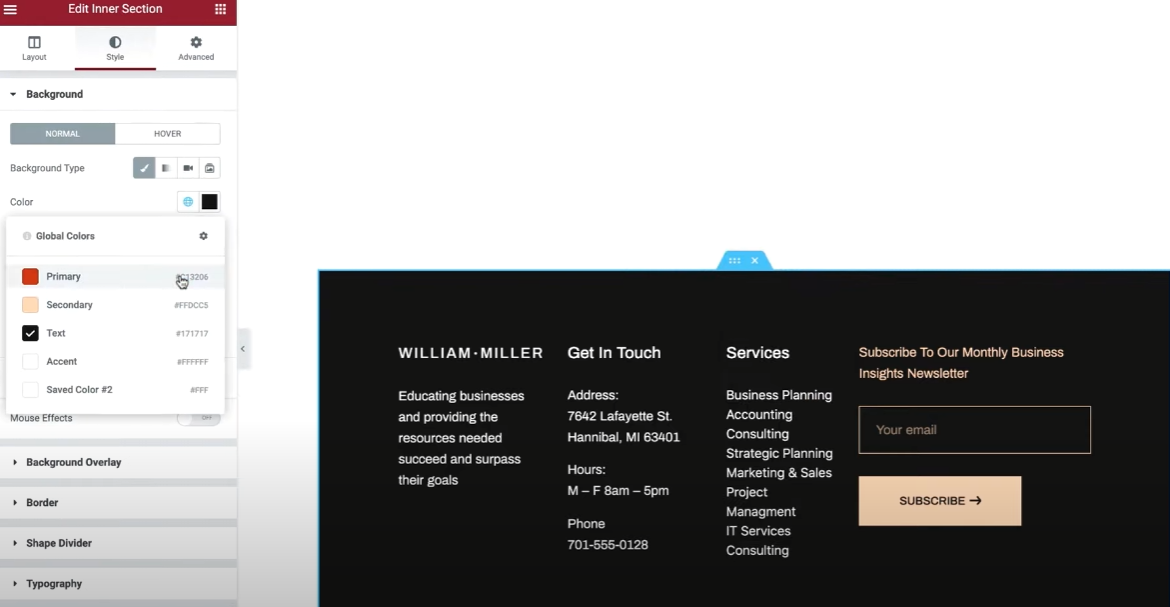
Depending on the template you’ve chosen, there may be a different number of columns and widgets that come with it. To re-design them, simply click on any part of the footer and you will then have access to the edit pane for each of them on the left of your screen.
In the editing pane, you will be able to change the content of each element of the footer, whether it is changing the colour in the Style section or changing the links of buttons in the “Content” section.
Once you are done, preview to see what the footer looks like on different devices to ensure mobile responsiveness, then click on “Publish”.
Step 4: Set Conditions

When asked to set the conditions of displaying the footer, determine which pages you want the footer displayed, then add conditions to include and exclude pages accordingly.
While the footer is usually displayed on sites where the header is shown, you do not have to always do that. Since your header and footer are different elements from each other, you can choose to make them have different conditions if you so desire.
Now that you’re equipped with the skills to create captivating headers and footers, feel free to explore more features provided by the theme builder for more ways to beautify your headers and footers.
It is always good to continue to learn more about these features for as long as you continue to design websites so stick around for more guides on Elementor, WordPress, and more!
Related To:
Elementor Guide: How To Add Pop-ups To Your WordPress Website